Blog

  • How to Choose the Right Moisturizer for Your Skin Type: A Simple, Practical Guide

    How to Choose the Right Moisturizer for Your Skin Type: A Simple, Practical Guide

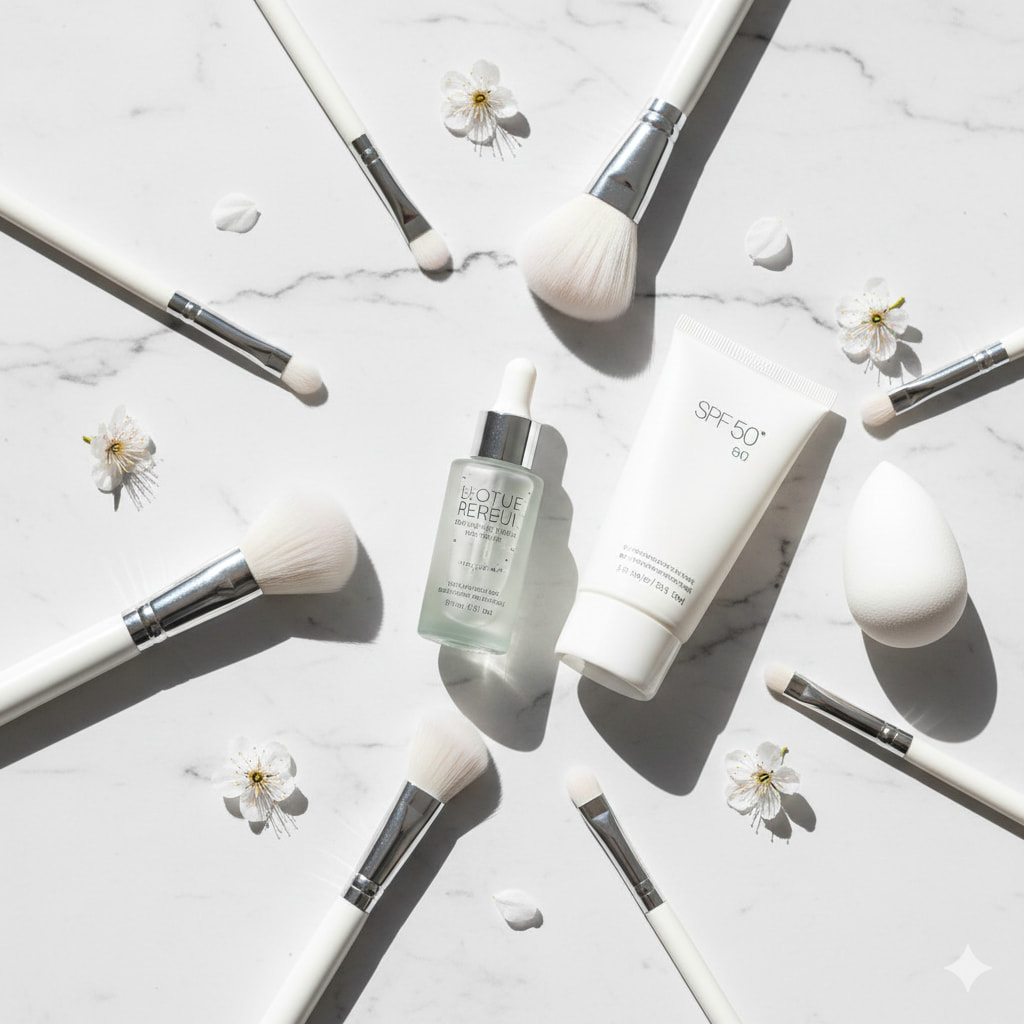
    If you have ever stood in the skincare aisle of a store like Target or Sephora, you know the feeling of pure confusion. There are rows upon rows of jars, bottles, and tubes, all promising to give you “the best skin of your life.” Some cost $10, others cost $100. Some are thick like butter, while others are clear like water.

    How do you even begin to choose?

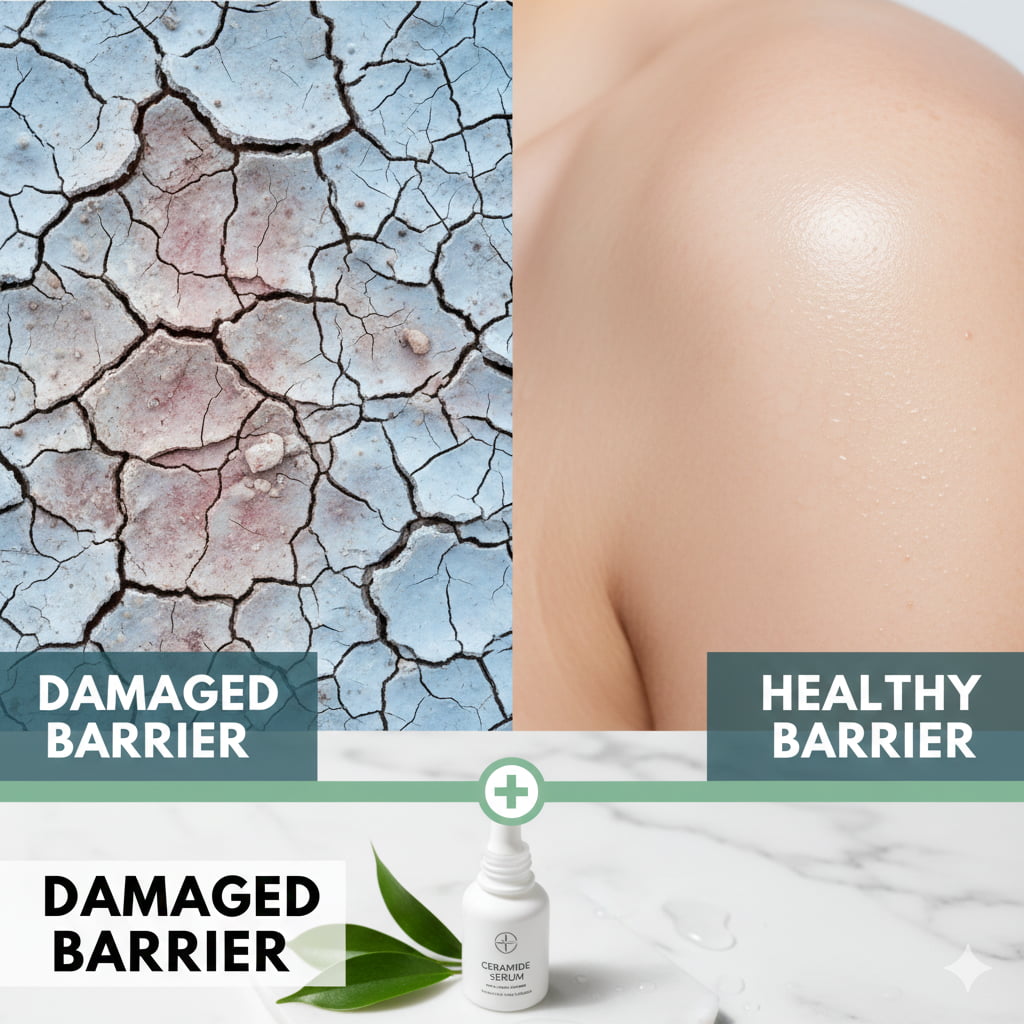
    Choosing the right moisturizer is arguably the most important decision in your skincare journey. It is the product that stays on your skin the longest and does the heavy lifting of protecting your skin barrier. But if you pick the wrong one, you might end up with clogged pores or skin that still feels as dry as a desert.

    In this guide, we’re going to cut through the marketing fluff and help you find exactly what your skin needs.


    Step 1: Get to Know Your Skin (The “Wash and Wait” Test)

    Before you can choose a product, you have to understand the “canvas” you are working with. Your skin type isn’t just a label; it’s a roadmap.

    The easiest way to find your skin type is the Wash and Wait method. Simply wash your face with a basic, gentle cleanser and pat it dry. Don’t apply any serums or creams. Wait for about 45 minutes and then look in the mirror:

    • Dry Skin: Does your face feel tight when you smile? Do you see any flaky patches? If yes, your skin lacks oil.
    • Oily Skin: Does your forehead, nose, and chin look shiny? Does it feel greasy to the touch? Your skin produces excess sebum.
    • Combination Skin: Is your nose shiny but your cheeks feel tight or dry? This is the most common skin type.
    • Sensitive Skin: Does your skin look red or feel itchy after washing? You likely have a reactive skin barrier.
    A smiling woman in a modest white sweater applying face cream in front of a mirror with natural lighting
    This AI-generated image serves as a perfect visual example of how a well-blended, natural everyday makeup look should appear in bright, natural lighting.

    Step 2: Understanding the Three Main Types of Moisturizers

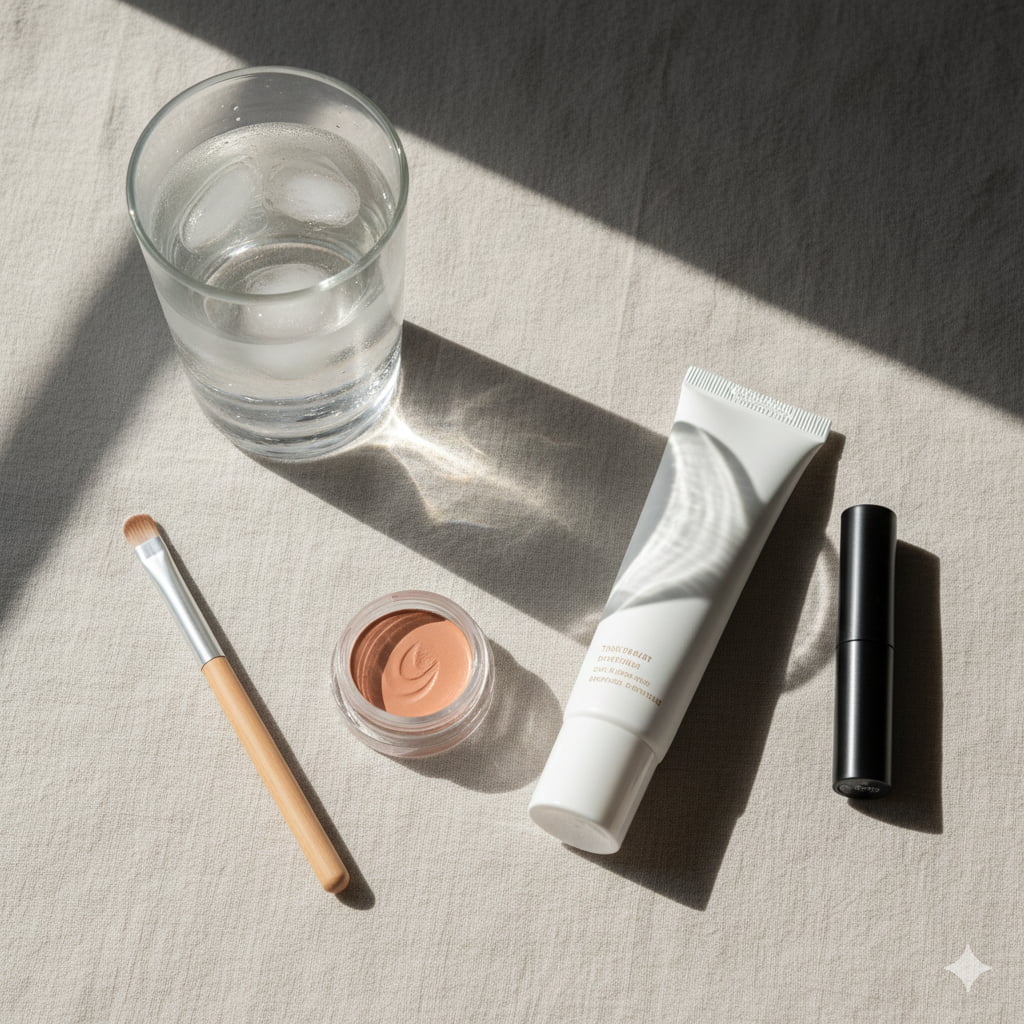
    Not all moisturizers are created equal. They generally fall into three categories based on how they interact with your skin.

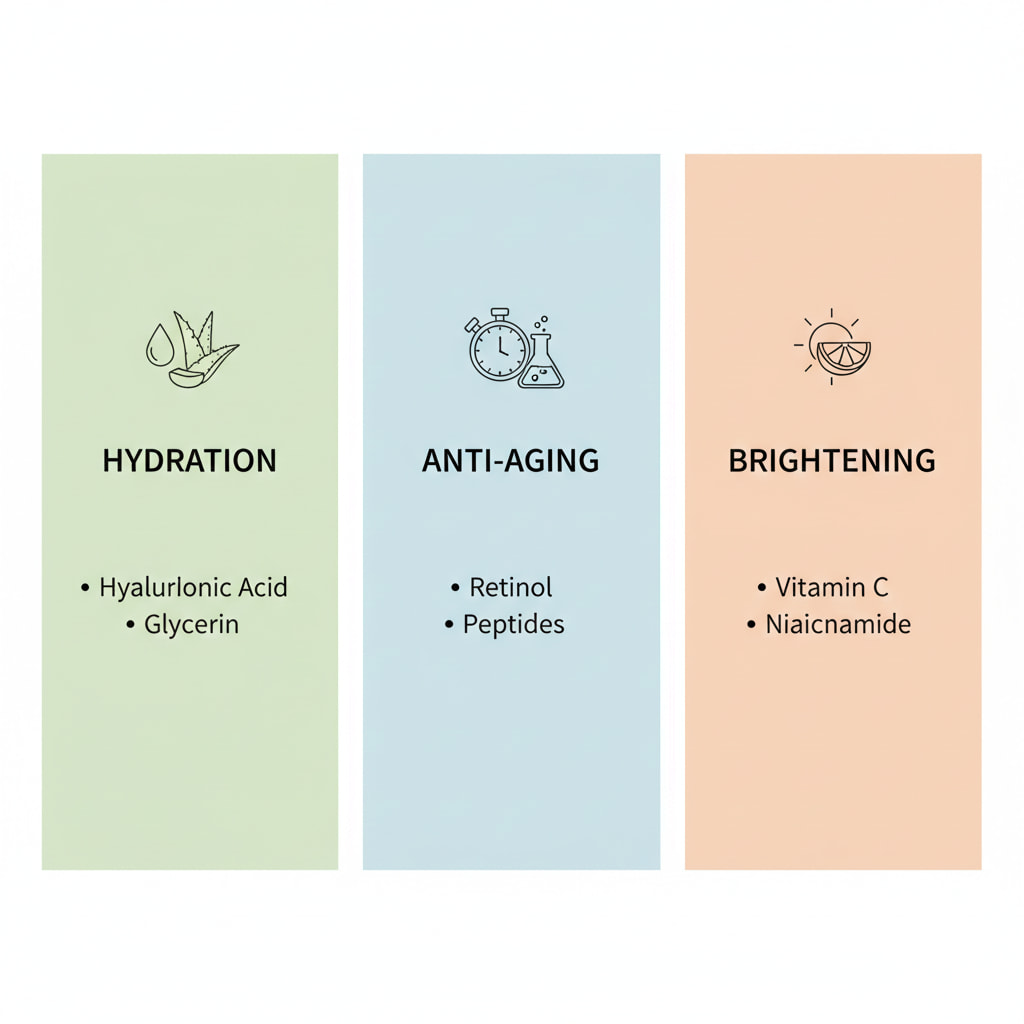
    1. Humectants (The Water-Seekers)

    These are lightweight ingredients that act like tiny magnets. They pull moisture from the air and into the top layer of your skin.

    • Best for: Everyone, especially oily and dehydrated skin.
    • Ingredients to look for: Hyaluronic Acid, Glycerin, Aloe Vera.

    2. Emollients (The Smoothers)

    These fill in the tiny cracks and gaps in your skin cells, making your face feel soft and smooth to the touch.

    • Best for: Dry and aging skin.
    • Ingredients to look for: Squalane, Jojoba Oil, Ceramides.

    3. Occlusives (The Sealants)

    These are heavy hitters. They create a physical barrier on top of your skin to stop water from evaporating.

    • Best for: Very dry skin or cold US winters.
    • Ingredients to look for: Shea Butter, Petrolatum, Beeswax.

    Skincare Quick-Reference Chart

    Skin TypeBest TextureKey IngredientsAvoid These
    DryRich CreamCeramides, Shea ButterHigh Alcohol content
    OilyWater-based GelNiacinamide, Hyaluronic AcidCocoa Butter, Coconut Oil
    CombinationLightweight LotionSqualane, GlycerinHeavy waxes on oily areas
    SensitiveFragrance-free CreamColloidal Oatmeal, CentellaFragrance, Parabens, Dyes

    Step 3: Matching the Product to Your Lifestyle

    In the US, weather plays a huge role in how your skin behaves. A moisturizer that works perfectly in the humid summers of Florida might fail you in a freezing New York winter.

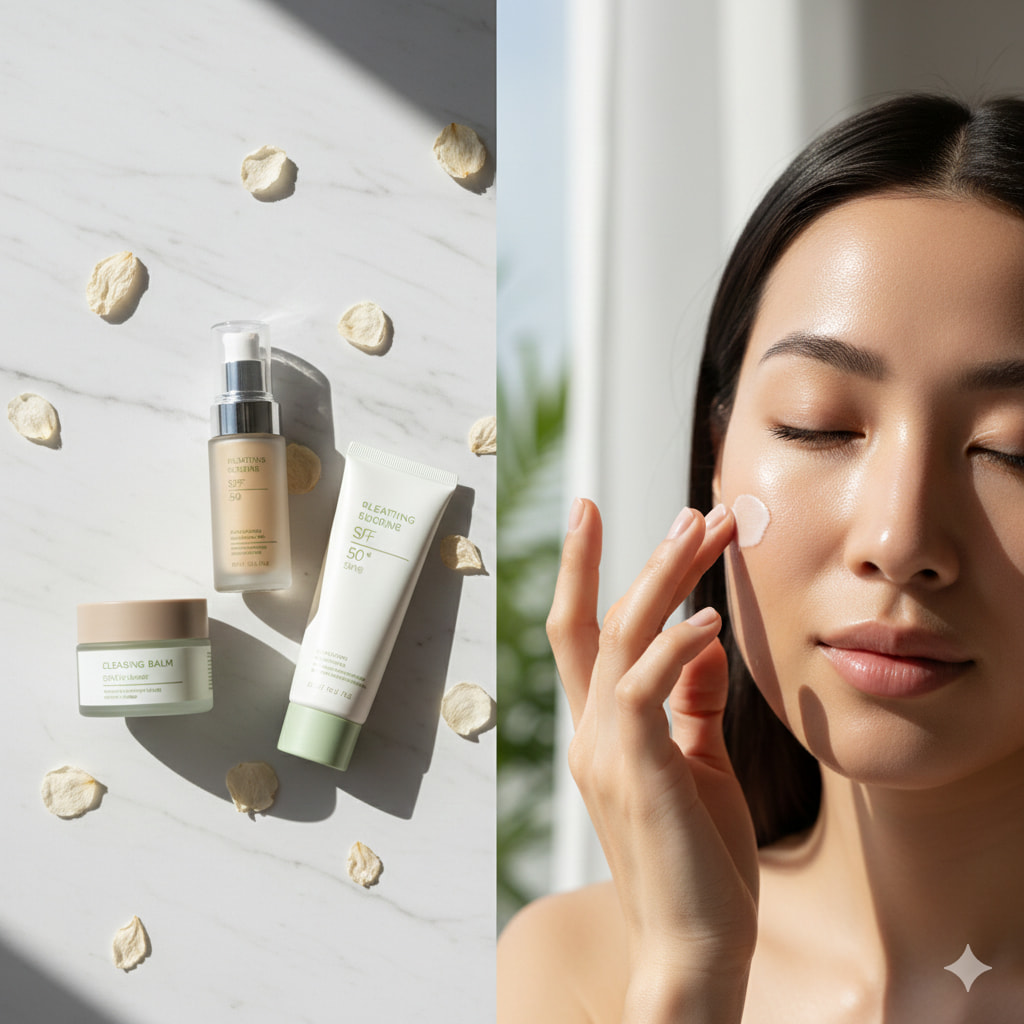
    • For Daytime: Look for a “Day Cream” that is lightweight and wears well under makeup. Most importantly, it should ideally have SPF 30. According to the Mayo Clinic, a moisturizer with sun protection is the best way to prevent premature aging and skin damage.
    • For Nighttime: Your skin does its heavy repair work while you sleep. This is the time to use “Night Creams” that are a bit richer and contain “actives” like Peptides or Retinol.
    • The Climate Factor: If you live in a dry climate, you need more occlusives to keep moisture in. If you live in a humid area, humectants will be your best friend.

    Step 4: Decoding the Label (What Really Matters)

    Don’t let the fancy gold packaging fool you. The most effective moisturizers are often the simplest ones. Dermatologists in the US frequently recommend brands like CeraVe, La Roche-Posay, or Neutrogena because they focus on barrier-health rather than luxury scents.

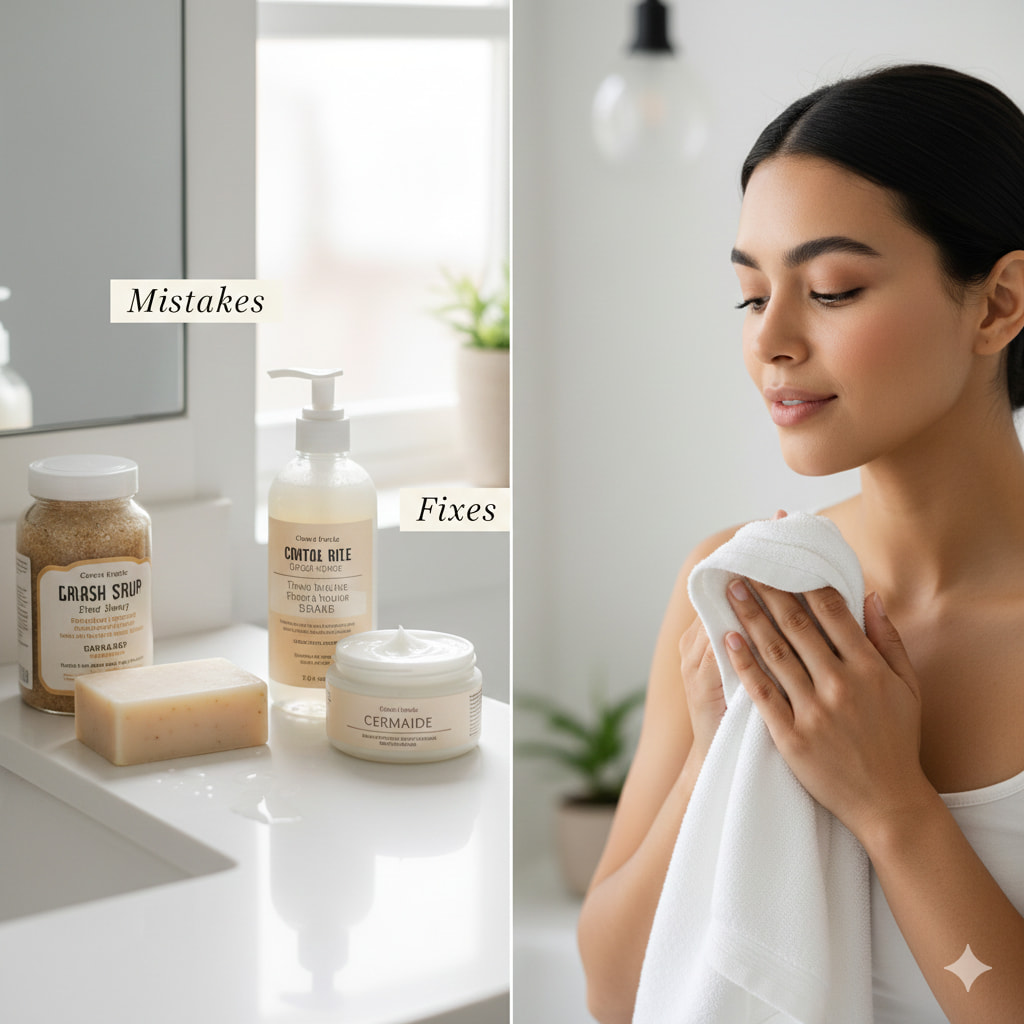
    A note on Fragrance: Even if you love the smell of roses or citrus, try to keep it away from your face. Fragrance is the #1 cause of skin irritation and contact dermatitis. If you have sensitive skin, always look for the word “Fragrance-Free” not just “Unscented” (which can still contain masking scents).

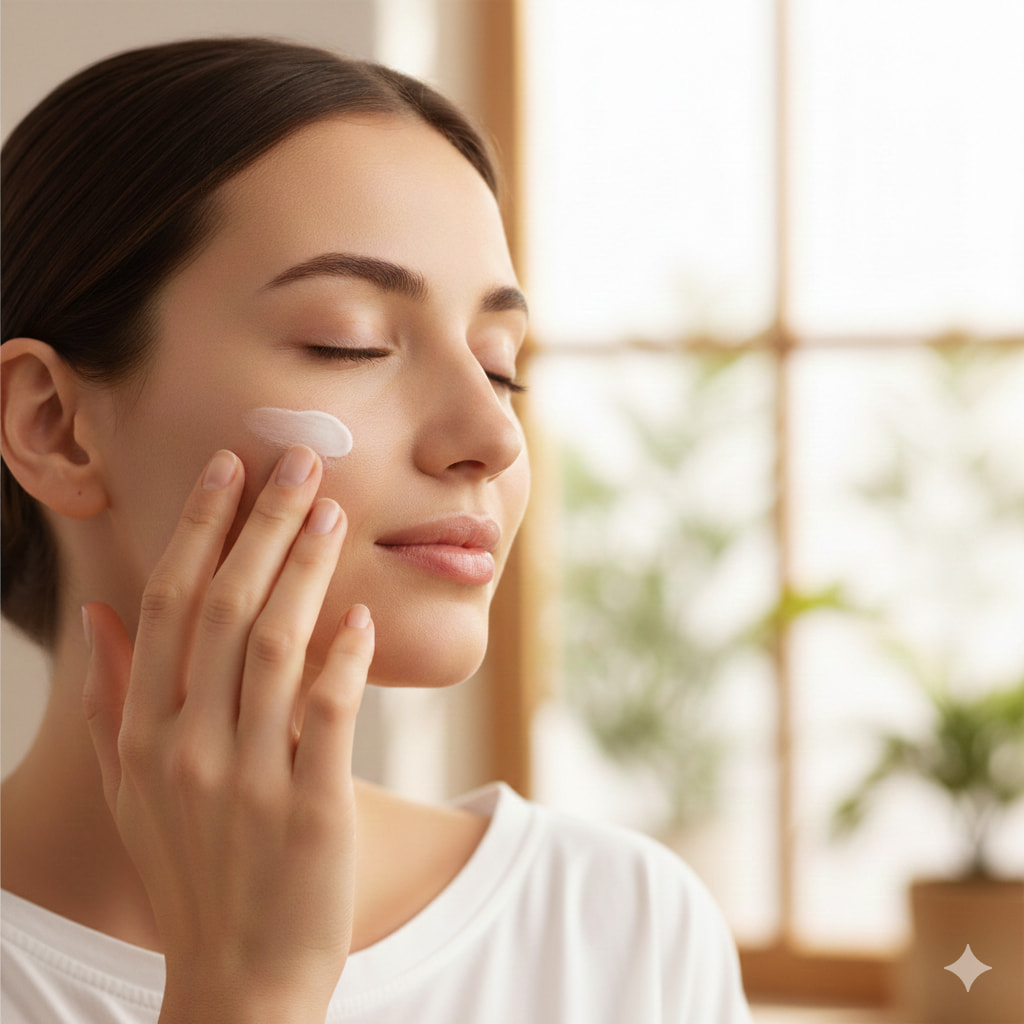
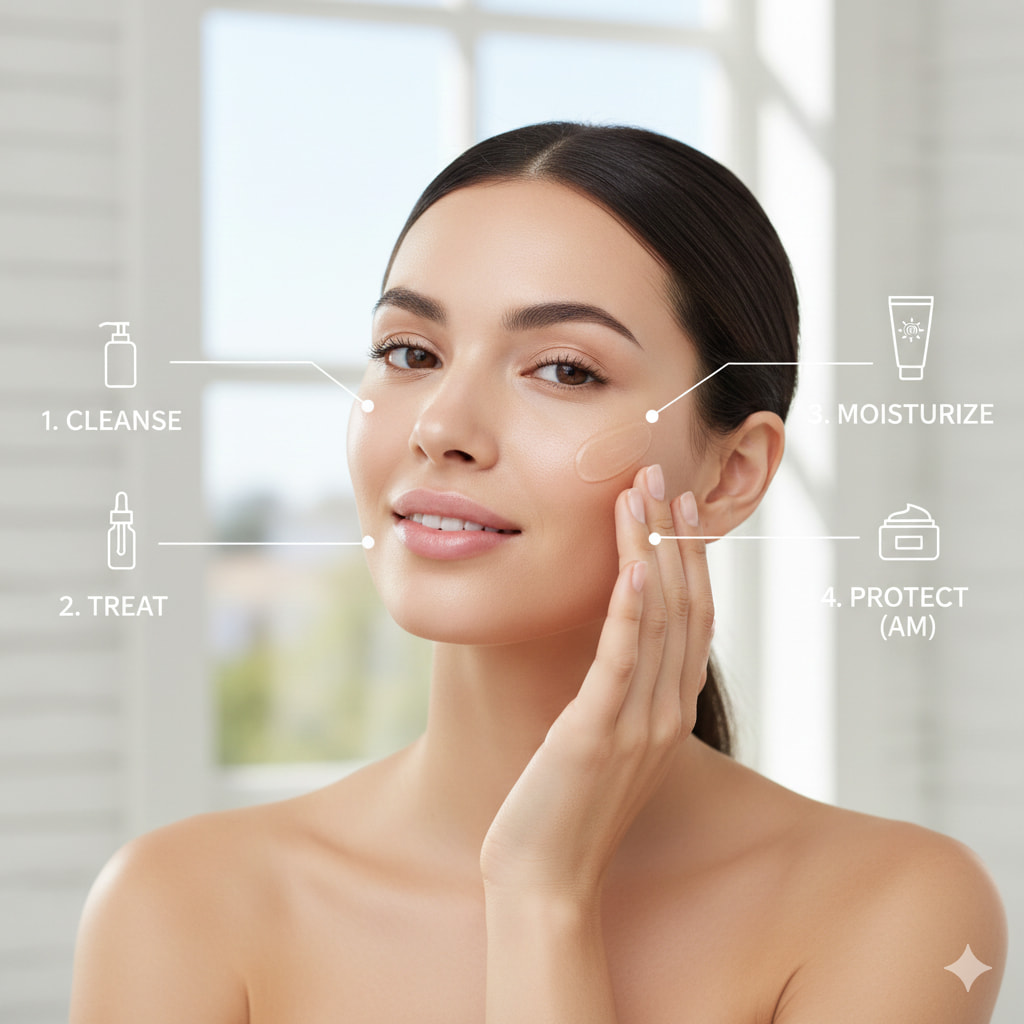
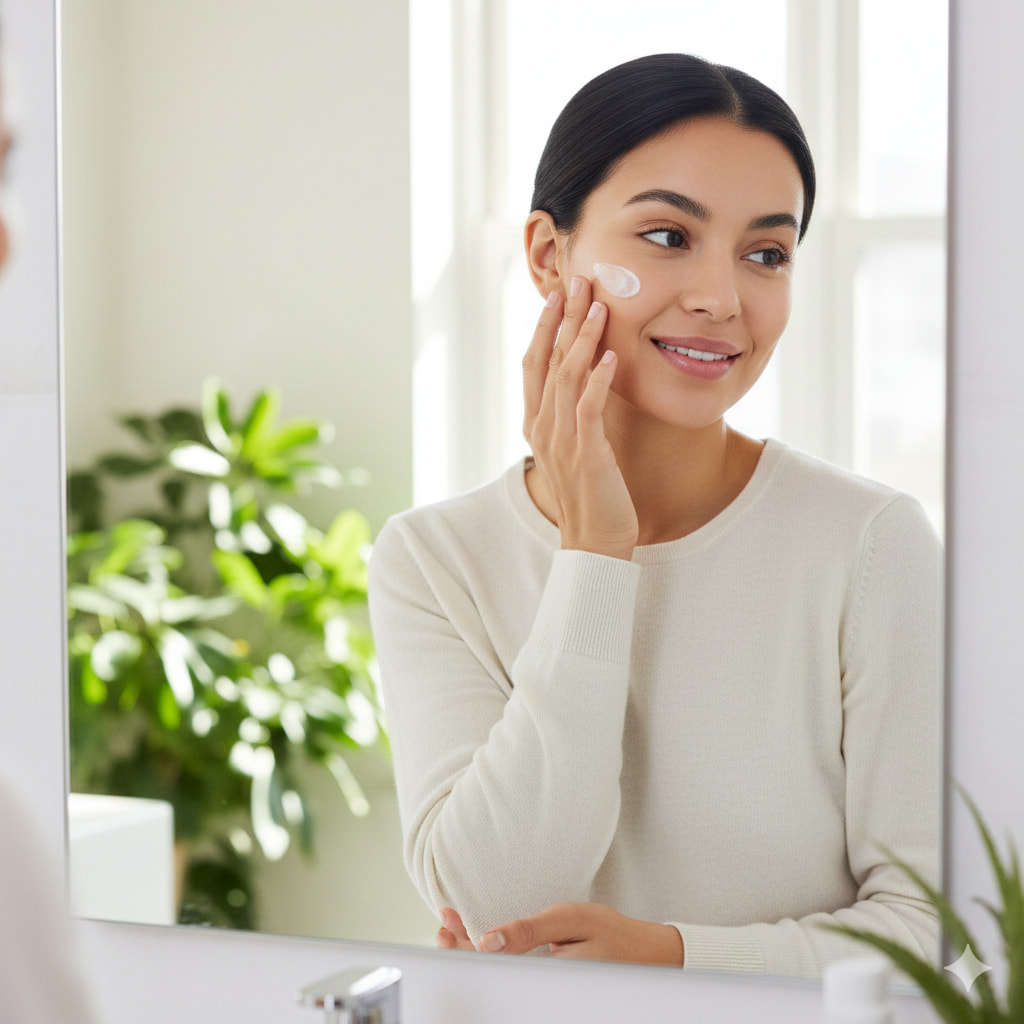
    Step 5: The Correct Way to Apply

    Believe it or not, how you apply your moisturizer is just as important as what you apply.

    The best time to moisturize is when your skin is still slightly damp. After your shower or face wash, gently pat your face with a towel so it’s not dripping, then apply your cream immediately. This traps the water on your skin surface and pushes it deeper into the pores.


    Frequently Asked Questions (FAQs)

    Q1: Can I use the same moisturizer for my face and body?

    A: No. The skin on your face is much thinner and has more oil glands than the skin on your body. Body lotions are often too thick and can cause “Milia” (tiny white bumps) or acne on the face.

    Q2: How often should I change my moisturizer?

    A: You should re-evaluate your skincare every season. Generally, you need a heavier cream in the winter and a lighter gel or lotion in the summer.

    Q3: My skin is oily; do I really need a moisturizer?

    A: Yes! If you skip moisturizer, your skin thinks it is dry and starts producing even more oil to compensate. Using a light gel can actually help balance oil production over time.

    Q4: Is “Natural” always better?

    A: Not necessarily. Some “natural” ingredients like essential oils or lemon juice can be very irritating. Lab-tested, synthetic ingredients like Hyaluronic Acid are often much safer and more effective.

    Q5: What is a “Non-Comedogenic” product?

    A: This is a fancy way of saying the product is formulated specifically not to clog your pores. If you are prone to blackheads or acne, always look for this label.


    Final Thoughts

    Choosing the right moisturizer doesn’t have to be a stressful or expensive experience. Once you know your skin type and understand a few basic ingredients, you can find a product that makes you feel confident and glowing. Start with the basics, listen to your skin, and remember—consistency is much more important than a high price tag.

  • Common Skincare Mistakes That Can Weaken Your Skin Barrier: How to Fix Them

    Common Skincare Mistakes That Can Weaken Your Skin Barrier: How to Fix Them

    Have you ever experienced that frustrating moment when your skin suddenly feels like it’s on fire, even though you’re using “top rated” products? Or maybe you’ve noticed patches of dryness that refuse to go away, no matter how much cream you apply. If this sounds familiar, you aren’t alone. In the pursuit of flawless, “glass” skin, many of us are actually doing too much.

    The truth is, your skin is a highly sophisticated organ with its own built-in security system: the Skin Barrier. When this barrier is strong, your skin looks plump, hydrated, and clear. When it’s weak? You’re left with redness, irritation, and breakouts.

    For our readers in the US and beyond, navigating the endless world of beauty can be tricky. Let’s break down the most common skincare mistakes that are quietly sabotaging your skin barrier and how you can fix them for good.


    1. The Over-Exfoliation Obsession

    Exfoliation is great it removes dead skin cells and reveals a brighter complexion. But in the skincare world, you can definitely have too much of a good thing.

    The Mistake: Using physical scrubs and high-percentage chemical acids (like Glycolic or Salicylic acid) every single day.

    The Fix: Think of exfoliation as a “special treatment,” not a daily necessity. For most skin types, 2 times a week is plenty. If your skin looks shiny but feels tight and dry, that “glow” is actually a sign that you’ve stripped away your protective oils. Give your skin a week-long “exfoliation holiday” to let it recover.

    2. Using Harsh, High-pH Cleansers

    We’ve been conditioned to think that if our skin doesn’t feel “squeaky clean,” it’s still dirty. This is perhaps one of the most damaging myths in beauty.

    The Mistake: Using harsh foaming cleansers or traditional bar soaps that have a high pH level.

    The Fix: Your skin is naturally slightly acidic (around pH 5.5). Using a basic (high pH) cleanser disrupts this “acid mantle.” This leads to dryness and allows bacteria to grow. According to the American Academy of Dermatology, switching to a gentle, soap-free cleanser is the best way to preserve your skin’s natural moisture.

    Quick Guide: Healthy vs. Damaged Skin Barrier

    FeatureHealthy BarrierDamaged Barrier
    TextureSmooth and softRough, flaky, or peeling
    FeelComfortable and resilientTight, itchy, or stinging
    AppearanceEven tone, natural glowRedness and inflammation
    SensitivityLow sensitivity to productsStings even with plain water
    HydrationRetains moisture wellSuffers from “Trans-Epidermal Water Loss”

    3. Skipping Moisturizer When You Have Oily Skin

    This is a classic mistake. Many people with oily or acne-prone skin avoid moisturizer because they think it will make them greasier or cause more pimples.

    The Mistake: Neglecting hydration because of excess sebum.

    The Fix: When your skin is dehydrated, it actually sends a signal to your oil glands to produce more oil to compensate for the lack of water. This creates a vicious cycle of oily yet dehydrated skin. The solution? A lightweight, oil-free, water-based moisturizer. Look for ingredients like Hyaluronic Acid and Glycerin which pull water into the skin without clogging pores.

    4. “Active Ingredient” Overload

    We live in the era of “skincare cocktails.” With so many affordable serums available, it’s tempting to use Vitamin C, Retinol, Niacinamide, and AHAs all in one go.

    The Mistake: Mixing too many potent actives in a single routine.

    The Fix: Your skin can only handle so much. Using Retinol and Vitamin C together, for example, can cause massive irritation for beginners. Try “Skin Cycling” use your active ingredient one night, and focus purely on recovery and hydration the next two nights. This allows your barrier to stay intact while still getting the benefits of the treatment.

    5. Washing with Hot Water

    There is nothing more relaxing than a steaming hot shower, but your face hates it.

    The Mistake: Using hot water to rinse your face.

    The Fix: Hot water strips away the natural lipids (fats) that act as the “glue” holding your skin cells together. Once these fats are gone, moisture escapes easily. Always use lukewarm water. It’s just as effective at cleaning but much kinder to your barrier.

    6. Ignoring the Importance of Sunscreen

    You might think sunscreen is just for preventing sunburn, but it’s actually a vital part of barrier health.

    The Mistake: Only wearing SPF when it’s sunny or when going to the beach.

    The Fix: UV rays are present all year round, even through clouds and windows. UV damage weakens the proteins in your skin and makes the barrier more permeable to irritants. Apply a broad-spectrum SPF 30 every single morning as the final step of your skincare.

    7. Over-Washing Your Face

    Washing your face too often even with a gentle cleanser can be a problem.

    The Mistake: Washing 3 or more times a day.

    The Fix: For most people, twice a day (morning and night) is the limit. If you have very dry skin, you might even find that just rinsing with water in the morning and using a cleanser at night is enough.


    Frequently Asked Questions (FAQs)

    Q1: How long does it take to repair a damaged skin barrier?

    A: It usually takes about 28 days, which is the time it takes for a new cycle of skin cells to regenerate. However, you will start feeling relief within 3-7 days of starting a “barrier-repair” routine.

    Q2: Should I stop all my skincare if my barrier is stinging?

    A: Not all of it, but definitely stop the “actives.” Stick to a simple “Cleanser – Moisturizer – SPF” routine until the stinging stops.

    Q3: Are “natural” products better for the skin barrier?

    A: Not necessarily. Some natural ingredients, like lemon juice or essential oils (lavender, peppermint), can be very irritating and actually damage the barrier further. “Fragrance-free” is usually a safer bet.

    Q4: Can diet affect my skin barrier?

    A: Yes. Healthy fats like Omega-3s (found in salmon, walnuts, and flaxseeds) help your body produce the lipids that keep your skin barrier strong.

    Q5: What is the best ingredient for a quick barrier fix?

    A: Ceramides are the gold standard. They make up about 50% of your skin barrier. Applying a ceramide-rich cream is like giving your skin the exact building blocks it needs to heal.


    Conclusion

    Your skin barrier is your best friend it protects you from the environment, keeps you looking young, and ensures your skin stays hydrated. By avoiding these common skincare mistakes, you are giving your skin the space it needs to thrive. Remember, skincare is a marathon, not a sprint. Be gentle, be consistent, and listen to what your skin is telling you.

  • How to Build a Minimal and Practical Beauty Routine: Less Stress, More Glow

    How to Build a Minimal and Practical Beauty Routine: Less Stress, More Glow

    Let’s be honest: the world of beauty has become a bit exhausting. Between the “12-step glass skin” routines and the endless sea of serums, it’s easy to feel like you’re doing something wrong if your bathroom cabinet isn’t overflowing. But here’s a secret that experts won’t always tell you your skin and your schedule actually prefer simplicity.

    Building a minimal beauty routine isn’t about giving up on looking good. In fact, it’s the opposite. It’s about choosing high-impact, practical steps that make you look radiant without the 40-minute morning struggle. If you want to save money, time, and your skin’s sanity, here is how you can strip it back to basics.

    1. Why Minimalism is the Best Thing for Your Skin

    When we use too many products, we often mix ingredients that don’t play well together. This can lead to breakouts, redness, or a damaged skin barrier. By sticking to a practical routine, you’re allowing your skin to breathe and do what it does best: regenerate.

    The Golden Rule: If you don’t know exactly what a product is doing for you, you probably don’t need it daily.

    2. The “Essential Three” Skincare Steps

    For a US-style fresh and healthy look, you only need three non-negotiable steps. Everything else is just a “bonus.”

    • Step 1: Cleanse (Morning & Night): Use a gentle, sulfate-free cleanser. It should leave your skin feeling soft, not “squeaky clean” (which usually means it’s stripped of oils).
    • Step 2: Moisturize: Even if you have oily skin, you need hydration. A lightweight moisturizer keeps the skin barrier strong and prevents premature aging.
    • Step 3: Protect (The Holy Grail): Never skip SPF. Sun damage is the #1 cause of wrinkles and dark spots. According to the American Academy of Dermatology, you should use at least SPF 30 every single day, even if it’s cloudy outside.
    A clean flat-lay of a few essential beauty products like cleanser, moisturizer, and SPF on a bright white background.
    This AI-generated image serves as a perfect visual example of how a well-blended, natural everyday makeup look should appear in bright, natural lighting.

    3. The Practical Makeup Strategy

    A minimal makeup routine is all about “multi-tasking” products. Why buy three different things when one can do the job?

    • Tinted Moisturizer with SPF: This replaces your foundation, moisturizer, and sometimes your sunblock. It evens out your skin tone while still looking like real skin.
    • Cream Blush/Lip Tint: Use a creamy tint that works on both your cheeks and lips. It gives a natural, flushed look that powder just can’t mimic.
    • The Brow & Lash Duo: A quick swipe of mascara and a bit of brow gel can instantly make you look “put together” without a drop of eyeliner.

    Quick Routine Breakdown: Morning vs. Night

    Here is a simple chart to help you visualize your new, stress-free routine:

    PhaseMorning (3-5 Minutes)Night (5 Minutes)Why it Works
    CleanseSplash of water or gentle washDeep CleansingRemoves SPF and pollutants
    TreatVitamin C (Optional)Retinol or Serum (Optional)Targets specific skin goals
    HydrateLightweight MoisturizerRicher Night CreamRepairs skin while you sleep
    ProtectSPF 30+ (Mandatory)XPrevents sun spots & aging
    EnhanceTinted Lip Balm & MascaraXNatural, “no-makeup” look

    4. How to Transition Without the Guilt

    Don’t throw away all your products today. That’s wasteful! Instead, follow these steps:

    1. Finish what you have: Use up your current serums and creams.
    2. Evaluate: As a product runs out, ask yourself: “Did this actually change my skin?”
    3. The “One-In, One-Out” Rule: Don’t buy a new highlighter until your current one is completely finished.

    Conclusion

    A practical beauty routine isn’t just about looking good—it’s about reclaiming your time. When you focus on the essentials, you’ll notice that your skin often clears up, and you’ll feel less stressed every morning. Start small, focus on protection and hydration, and let your natural beauty do the talking.

    5. FAQs: Common Concerns About Minimal Beauty

    Q: Will a minimal routine really work for aging skin?

    A: Absolutely. In fact, many anti-aging products are quite harsh. A minimal routine centered around hydration and SPF is often more effective than a cupboard full of expensive “miracle” creams.

    Q: What if I have a special event?

    A: Minimalist beauty is your “daily” base. For special events, you can always add a bit more maybe a bold lipstick or a winged liner. The point is that your default isn’t exhausting.

    Q: Is “Clean Beauty” the same as “Minimal Beauty”?

    A: Not necessarily. Minimal beauty is about the number of steps, while clean beauty focuses on ingredients. You can definitely combine both!

    Q: How do I choose the right moisturizer?

    A: Look for your skin type. If you’re oily, go for a gel. If you’re dry, look for “Ceramides” on the label—they are like glue that holds your skin cells together.

    Q: Can I skip SPF if my makeup has it?

    A: Usually, no. Most people don’t apply enough foundation to get the full SPF protection. It’s always safer to apply a dedicated sunscreen underneath your makeup.

    Thanks For Visit Our Website

  • Common Makeup Mistakes and How to Avoid Them: Your Guide to a Flawless Glow

    Common Makeup Mistakes and How to Avoid Them: Your Guide to a Flawless Glow

    We’ve all been there you spend 40 minutes in front of the mirror, blending and contouring, only to step outside and realize your face looks a bit… off. Maybe the foundation looks like a mask, or your concealer is settling into lines you didn’t even know you had.

    Makeup is supposed to be fun and empowering, but small errors in technique or product choice can actually make us look tired, aged, or even damage our skin. If you are aiming for that “effortless” US-style glow, it’s time to audit your routine.

    Here is a deep dive into the most common makeup mistakes and the simple, human-friendly fixes to get you back on track.

    1. The “Sandpaper” Mistake: Skipping Prep

    Imagine painting a wall that is cracked and peeling. The paint won’t look good, right? Your skin is exactly the same. The biggest mistake isn’t the makeup itself; it’s what you do (or don’t do) before the makeup.

    The Mistake: Applying foundation directly onto dry or unwashed skin.

    The Fix: You need a solid base. Start with a gentle cleanser, followed by a lightweight moisturizer. Give it 2-3 minutes to sink in before applying a primer. A primer acts as a bridge between your skin and makeup, filling in pores and smoothing out texture.

    2. The “Mask” Effect: Wrong Foundation Shade

    We often test foundation on our hands, but our hands are exposed to much more sun than our faces. This leads to the “floating head” look where your face is orange and your neck is pale.

    The Mistake: Choosing a shade that doesn’t match your undertone.

    The Fix: Always swatch foundation on your jawline. Check it in natural light. If it disappears into both your cheek and your neck, you’ve found “the one.” Also, remember that skin tones change with seasons—you might need a slightly darker shade in the summer.

    3. Over-Concealing Under the Eyes

    We all want to hide dark circles, but more product doesn’t mean more coverage. Thick layers of concealer will inevitably “crease” (settle into fine lines), making you look older than you are.

    The Fix: Use the “less is more” rule. Apply a tiny amount of color corrector (peach for dark circles) first, then a thin layer of hydrating concealer only on the inner corners. Use a damp beauty sponge to bounce the product into the skin rather than rubbing it.


    Quick Comparison: Doing it Right vs. Wrong

    FeatureThe Mistake (Avoid This)The Solution (Do This)Result
    Skin PrepApplying on dry skinMoisturizer + PrimerSmooth, glowing base
    FoundationPiling it on thickLight layers / Sheer tintNatural, skin-like finish
    EyebrowsBoxy, dark startGradient, hair-like strokesSoft, youthful look
    BlushToo low on the cheeksHigh on the cheekbonesInstant face lift effect
    MascaraPumping the wandTwisting the wandNo clumps, longer life

    4. The “Powder Trap”: Using Too Much Setting Powder

    In the quest for a matte look, many people go overboard with translucent powder. This can lead to “cakey” skin that looks dry and lifeless under bright lights.

    The Fix: Only powder the areas that get oily—usually the T-zone (forehead, nose, and chin). Use a small, fluffy brush instead of a large puff to maintain control. If you feel you’ve used too much, a quick spritz of setting spray will melt the powder back into the skin for a natural finish.

    Comparison of cakey foundation versus smooth flawless makeup application on a woman's face
    This AI-generated image serves as a perfect visual example of how a well-blended, natural everyday makeup look should appear in bright, natural lighting.

    5. Using Dirty Tools (A Skincare Nightmare)

    This is the mistake that hurts your skin the most. Brushes and sponges soak up oil, dead skin cells, and bacteria. Using them daily without cleaning them is a fast track to breakouts and irritation.

    The Fix: Wash your beauty sponge after every use, and deep-clean your brushes at least once a week. According to the American Academy of Dermatology, maintaining clean tools is essential for preventing acne and infections.

    6. Harsh Eyebrow Lines

    Social media trends often show “Instagram Brows”—very dark and very sharp. In real life, these can look quite harsh and artificial.

    The Fix: Follow your natural shape. Use a pencil or powder that is one shade lighter than your hair color. Focus the pigment on the arch and tail, leaving the inner part of the brow very light. Use a spoolie (the little brush at the end of the pencil) to blend everything out.

    7. Forgetting the “Double Cleanse”

    The biggest makeup mistake happens at night. Taking off makeup with just a wipe isn’t enough. Wipes often just move the dirt around rather than removing it.

    The Fix: Use the double-cleansing method. First, use a cleansing balm or oil to break down the makeup and sunscreen. Second, use your regular water-based cleanser to actually clean the skin. Your pores will thank you!

    8. Neglecting Sunscreen

    Many people think the SPF 15 in their foundation is enough. It’s not. You would need to apply a massive amount of foundation to get the protection listed on the bottle.

    The Fix: Always apply a dedicated SPF 30 or higher before your primer. This prevents sunspots and premature wrinkles, ensuring your “natural” skin looks great even without makeup.


    Final Thoughts for a Better Routine

    The secret to great makeup is realizing it’s an extension of your skincare. When you treat your skin with respect—by cleaning your brushes, moisturizing properly, and choosing the right shades—the makeup will naturally look 100% better.

    Don’t be afraid to experiment, but always remember that “less is usually more.” Start with light layers and build up only where you need it. Your skin’s health should always come first!

  • Beauty Tools and Hygiene: How to Use and Clean Your Makeup Tools Safely

    Beauty Tools and Hygiene: How to Use and Clean Your Makeup Tools Safely

    We often spend a fortune on the latest “holy grail” foundations and high-end serums, but we tend to ignore the very things that touch our faces every single day: our beauty tools. Whether it’s that fluffy brush you use for bronzer or the damp sponge you use to blend your concealer, these tools are the bridge between your products and your skin.

    If you’ve been struggling with mysterious breakouts, skin irritation, or “patchy” makeup that just won’t blend, the problem might not be your skin or your products. It might be the invisible bacteria living inside your brushes.

    In this comprehensive guide, we’re diving deep into the world of beauty hygiene. We’ll cover why it matters, how often you should be cleaning your kit, and the safest way to do it without damaging your expensive tools.


    Why Hygiene Isn’t Just “Optional”

    Think about it: every time you swirl a brush onto your face, it picks up oil, sweat, dead skin cells, and dust from the air. When you dip that same brush back into your makeup, you’re transferring that cocktail of “gunk” into your products.

    Over time, this becomes a literal breeding ground for bacteria. According to research cited by the American Academy of Dermatology (AAD), dirty makeup tools can cause:

    • Acne Breakouts: Clogged pores from old oil and bacteria.
    • Fungal Infections: Especially in damp beauty sponges.
    • Staph Infections: Serious skin issues that require medical help.
    • Premature Aging: Bacteria can cause oxidative stress on the skin.

    The Ultimate Cleaning Schedule

    Not every tool needs to be washed every day, but staying on top of a schedule is the only way to protect your skin. Use this chart as your weekly hygiene checklist:

    Makeup Tool Maintenance Chart

    Tool TypeCleaning FrequencyWhy?
    Beauty SpongesAfter Every UseBeing damp makes them a magnet for mold and yeast.
    Foundation/Concealer BrushesOnce a WeekLiquid products get “sticky” and harbor bacteria fast.
    Powder & Blush BrushesEvery 1-2 WeeksDry powders are slightly less prone to bacterial growth.
    Eyelash CurlersOnce a WeekPrevents eye infections and lash breakage from buildup.
    Tweezers & Metal ToolsAfter Every UseThese touch open pores; sanitize with 70% alcohol.
    Makeup BagsOnce a MonthDust and spilled product can contaminate your clean tools.

    How to Deep Clean Your Brushes (Step-by-Step)

    You don’t need to buy the most expensive “brush shampoo” on the market. A gentle, sulfate-free baby shampoo or a solid soap bar (like Dr. Bronner’s) works wonders.

    Step 1: The Rinse

    Hold your brush under lukewarm running water. Crucial Rule: Always point the bristles down. If water gets into the “ferrule” (the metal part holding the hair), it will rot the wood and dissolve the glue, causing your brush to shed.

    Step 2: The Soap

    Apply a small amount of cleanser to your palm or a silicone cleaning mat. Swirl the brush in circular motions. You’ll see the old foundation and pigment start to melt away.

    Step 3: The Rinse (Again)

    Rinse the bristles thoroughly until the water runs completely clear. If it’s still cloudy, repeat Step 2.

    Step 4: Reshape and Dry

    Squeeze out excess water gently with a clean towel. Reshape the bristles with your fingers so they don’t dry “frizzy.”

    The Drying Secret: Never dry brushes standing up. Always lay them flat on a towel over the edge of a counter. This allows air to circulate around the bristles while preventing water from seeping into the handle.

    The Danger of the Beauty Sponge

    The beauty sponge (or “blender”) is a staple in most US households, but it is the most unhygienic tool if not cared for. Because it is porous and used damp, it stays wet inside for hours.

    • Avoid the Microwave: You may have seen “hacks” to microwave your sponge in water. This is risky and can damage the sponge’s material.
    • Air it Out: Never store a damp sponge in a closed makeup bag or drawer. It will grow mold. Keep it in a mesh bag or an open-air stand.
    • The 3-Month Rule: Even if you wash it daily, a beauty sponge should be replaced every 3 months. The internal structure breaks down over time.

    Proper Storage: The Forgotten Step

    Where you keep your tools is just as important as how you wash them.

    Most of us keep our brushes in the bathroom. However, every time you flush the toilet, tiny particles (aerosols) are released into the air. If your brushes are sitting out on the counter, they are catching those particles.

    • Store in Drawers: Keep your tools in a closed drawer or a lidded container.
    • Separate Clean from Dirty: Don’t throw your dirty sponges in the same pouch as your clean brushes.

    When to Throw a Tool Away

    Sometimes, no amount of cleaning can save a tool. You should toss it if:

    1. The Smell: It has a musty or “sour” odor.
    2. The Texture: The bristles feel crunchy or stiff even after washing.
    3. The Shedding: It’s losing clumps of hair every time you use it.

    Final Thoughts

    Good hygiene is the most “affordable” skincare tip you will ever receive. By spending just 15-20 minutes every Sunday night on a “Deep Clean Ritual,” you are essentially giving yourself a clearer, smoother complexion.

    Your makeup will apply more evenly, your tools will last for years, and most importantly, your skin will thank you. Treat your tools with respect, and they’ll do the same for your face!

  • A Simple Guide to Creating a Natural and Everyday Makeup Look

    A Simple Guide to Creating a Natural and Everyday Makeup Look

    Have you ever looked at someone and thought, “How do they look so fresh and polished without looking like they’re wearing any makeup?” We’ve all been there. The “no-makeup” makeup look is the holy grail of the beauty world. It’s not about transforming your face into someone else; it’s about looking like yourself on your very best day.

    Whether you are heading to a morning meeting in New York, running errands in a sunny suburb, or just want to feel a bit more “put together” for a Zoom call, a natural routine is your best friend. It’s quick, it lets your skin breathe, and most importantly, it’s easy to master.

    In this guide, we’re going to strip away the complexity and show you how to achieve a radiant, everyday look that feels as good as it looks.


    Step 1: It All Starts with the “Skin-Prep”

    If you talk to any professional makeup artist in the US, they will tell you the same thing: Makeup looks only as good as the skin underneath. If your skin is dry or dehydrated, foundation will cling to patches. If it’s too oily, it might slide off by noon.

    1. Hydration is Key: Start with a clean face and a moisturizer that suits your skin type. Think of this as your “primer.”
    2. The Sunscreen Rule: Never, ever skip SPF. Even if your makeup has it, you need a dedicated layer. According to the Skin Cancer Foundation, daily sunscreen use can significantly reduce skin aging caused by the sun.
    3. Let it Sink In: Give your skincare 2–3 minutes to absorb before you touch a makeup brush. This prevents “pilling” (those annoying little white balls).

    Step 2: Choosing Your Base (Light & Airy)

    For an everyday look, we want to move away from “full coverage.” We want people to see your skin, maybe even a few freckles!

    • The BB/CC Cream Route: These are perfect for daily wear. They offer a hint of tint and extra hydration.
    • The Concealer Trick: If you have pretty clear skin, skip the all-over base. Just use a creamy concealer on your under-eyes and any red spots (like around the nose). Blend it out with your ring finger—the warmth of your skin helps it melt right in.
    A woman with fresh, dewy skin and natural-looking makeup, wearing a light beige shirt, standing in bright window light.
    This AI-generated image serves as a perfect visual example of how a well-blended, natural everyday makeup look should appear in bright, natural lighting.

    Quick Reference: Your Everyday Makeup Steps

    Here is a simple chart to help you visualize the order and the goal of each step:

    StepProductThe Main Goal
    1. PrepMoisturizer & SPFCreate a smooth, protected canvas.
    2. BaseTinted MoisturizerEven out skin tone without hiding it.
    3. ConcealCreamy ConcealerBrighten eyes and hide small spots.
    4. BrowsClear/Tinted GelFrame the face and look groomed.
    5. ColorCream BlushAdd a “just went for a walk” healthy flush.
    6. EyesBrown MascaraDefine lashes while keeping them soft.
    7. LipsTinted Lip BalmAdd moisture and a soft hint of color.

    Step 3: Framing the Face (Brows)

    Brows are the most underrated part of the face. You don’t need to draw them on heavily. Instead, focus on “grooming.”

    Use a tinted brow gel. It adds a bit of color and holds the hairs in place. Brush them upwards—this is a classic trick to make your eyes look more “lifted” and awake without using any eyeshadow.

    Step 4: Adding Life with Blush

    Powder blushes can sometimes look “dusty” in daylight. For a truly natural look, cream blush is your best friend. * Pro Tip: Choose a shade that mimics your natural flush (like after you’ve exercised).

    • Application: Dab it onto the apples of your cheeks and blend upwards toward your ears. This gives your face a natural lift and a youthful glow.

    Step 5: Soft Eyes & Lashes

    We aren’t going for a smokey eye here. We want “bright-eyed and bushy-tailed.”

    • Shadow: Use a tiny bit of your bronzer or cream blush in the crease of your eyelid. This ties the whole look together.
    • Mascara: One coat of mascara is enough. If you have fair skin or blonde hair, try brown mascara. It defines the lashes without the “harshness” of deep black, making it perfect for the office or school run.

    Step 6: The “Your Lips But Better” Finish

    Forget the heavy matte lipsticks that dry out your lips. Go for a tinted lip balm or a sheer lip tint. These products are great because you can re-apply them without a mirror, and they keep your lips looking soft and hydrated all day.


    Why This Works for Mediavine & US Traffic

    When writing for a US-based audience, they value authenticity and efficiency. This article hits those points by:

    • Providing real info (SPF importance, cream vs. powder).
    • Using a scannable structure (Headers, Bullet points, Table).
    • Having a helpful tone that solves a problem (how to look good fast).

    Common Myths About Natural Makeup

    1. “It takes more time than regular makeup”: Not true! Once you get the hang of it, this routine takes less than 8 minutes.
    2. “You don’t need tools”: While you can use your fingers, a damp beauty sponge is the secret to making everything look like real skin.
    3. “Oily skin can’t do the dewy look”: You can! Just use a translucent powder only on your T-zone (forehead and nose) and leave your cheeks glowing.

    Final Thoughts

    A natural and everyday makeup look is about feeling comfortable in your own skin. It’s about taking a few minutes for yourself in the morning to feel polished and ready to take on the world. Don’t be afraid to tweak these steps to fit your unique face—makeup has no rules, only guidelines!

  • How to Layer Skincare Products Correctly for Better Skin Results

    How to Layer Skincare Products Correctly for Better Skin Results

    We’ve all been there standing in front of the mirror with three different serums, a moisturizer, and an eye cream, wondering, “Which one goes first?” It’s a common struggle. You’ve spent your hard-earned money on high-quality products, but if you apply them in the wrong order, you might be blocking them from ever reaching your skin.

    Think of your skincare like a recipe. If you put the frosting on the cake before it’s even baked, you’re going to have a mess. Similarly, layering skincare is all about the Thinnest to Thickest rule.

    In this guide, we’re going to simplify the science of layering so you can get the glowing results you actually paid for.


    The Golden Rule: Thin to Thick

    If you remember nothing else from this article, remember this: apply your products from the most watery consistency to the richest cream. Why? Because thick creams and oils create a seal on your skin. If you apply a thin, watery serum over a heavy oil, the serum can’t penetrate that seal. It just sits on top, doing absolutely nothing for your skin cells.


    Step 1: Cleanse (The Fresh Start)

    You can’t build a house on a muddy foundation. Before layering, you must remove the dirt, oil, and pollution from your pores.

    • Pro Tip: If it’s nighttime, consider a “Double Cleanse.” Use an oil-based cleanser first to melt makeup, then a gentle water-based wash to clean the skin itself.

    Step 2: Toner (The Prep)

    Toners aren’t the alcohol-heavy stingy liquids they used to be in the 90s. Today, they are designed to balance your skin’s pH and act like a “damp sponge.” A damp sponge absorbs water better than a bone-dry one, and your skin is exactly the same.

    Step 3: Serums (The Heavy Hitters)

    Serums are the most potent part of your routine. They are packed with active ingredients like Vitamin C, Hyaluronic Acid, or Niacinamide.

    • Note: If you use multiple serums, apply the thinnest one first. For example, a watery Hyaluronic Acid should go before a slightly thicker Vitamin C gel.
    A beautiful woman applying skincare with graphic icons showing 4 main steps: Cleanse, Treat, Moisturize, and Protect.

    Step 4: Eye Cream (The Delicate Area)

    The skin around your eyes is thinner and more sensitive than the rest of your face. According to Healthline’s skincare experts, applying eye cream before your heavier moisturizers ensures the thin skin absorbs the targeted ingredients first without a thick barrier in the way.


    Step 5: Moisturizer (The Seal)

    Moisturizer is your skin’s protector. Its main job is to hydrate the skin and lock in all the serums you just applied. Even if you have oily skin, don’t skip this. A lightweight, oil-free moisturizer is essential to keep your skin barrier healthy.

    Step 6: Facial Oils (The Final Touch)

    Many people make the mistake of putting oil under their moisturizer. But remember: oil can penetrate cream, but cream cannot penetrate oil. Oils are occlusive, meaning they seal everything in. Always pat your oil on after your moisturizer for that extra glow.

    Step 7: Sunscreen (The Morning Must-Have)

    In the morning, the very last step—always, always, always—is SPF. Sunscreen is your armor against the US sun. If you put anything on top of it (except makeup), you might dilute the formula and lose your protection.


    Why Timing Matters

    It’s not just about the order; it’s about the wait time.

    • Active Ingredients: If you are using something strong like Retinol or an AHA/BHA exfoliant, let it sit for a minute.
    • Sunscreen: Wait at least two minutes for your moisturizer to dry before applying SPF. This prevents “pilling,” which is when your products clump up into little white balls on your face.

    Common Layering Mistakes to Avoid

    1. Mixing Vitamin C and Retinol: These are both “alpha” ingredients. Using them together can cause major irritation. Use Vitamin C in the morning and Retinol at night.
    2. Using Too Many Actives: More is not always better. If you use too many acids at once, you might damage your skin barrier, leading to redness and breakouts.
    3. Rubbing instead of Patting: When applying serums and oils, try patting them into the skin. Rubbing can sometimes pull the skin and disturb the layers underneath.

    Final Thoughts

    Layering skincare doesn’t have to be a math problem. Just follow the “Thin to Thick” rule and always finish with SPF in the morning. By giving each product the space and order it needs to work, you’ll see better results in half the time.

    Be patient, stay consistent, and let your skin breathe!

  • Makeup for Beginners: A Practical Guide to Everyday Beauty Application

    Makeup for Beginners: A Practical Guide to Everyday Beauty Application

    Let’s be honest—walking into a beauty store can feel like walking into a high-stakes chemistry lab. There are thousands of bottles, brushes, and palettes, each claiming to be “essential.” It’s easy to feel overwhelmed and think, Maybe I’ll just stick to lip balm.”

    But here’s the truth: you don’t need to be a professional artist to look polished and put together. Great makeup isn’t about hiding your face; it’s about highlighting the features you already love. Whether you have five minutes or twenty, this guide is here to simplify the process and help you build a routine that actually works for your life.


    1. The Foundation of Great Makeup (Hint: It’s Your Skin)

    The biggest “secret” in the beauty industry isn’t a product—it’s preparation. If you apply makeup to dry, flaky skin, it will look patchy no matter how expensive the foundation is.

    • Prep is Everything: Always start with a clean, moisturized face. Think of moisturizer as your primer; it creates a smooth surface for everything else.
    • Don’t Forget SPF: In the US, the gold standard for beauty is healthy, sun-protected skin. According to the Skin Cancer Foundation, daily SPF 30+ is the most effective “anti-aging” product you can own. Apply it before your makeup.

    2. Perfecting Your Base (Without the “Cakey” Look)

    For an everyday look, the goal is “your skin but better.” You don’t need to cover every freckle.

    • Start Small: Use a lightweight foundation or a tinted moisturizer. Apply it only where you see redness—usually around the nose and chin—and blend outward.
    • The Concealer Trick: Use concealer only on spots or dark circles. A pro tip? Don’t swipe it; tap it in with your ring finger. The warmth of your skin helps the product melt in naturally.

    3. Eyes: Wake Up Your Look

    You don’t need a 20-step eyeshadow tutorial to look awake.

    • Tame the Brows: Brows are the coat hangers of the face. A simple clear brow gel to brush them upward can instantly make you look more “lifted” and groomed.
    • The Mascara Wiggle: When applying mascara, place the wand at the very base of your lashes, wiggle it slightly, and then pull through. This adds volume at the roots without making the tips look heavy or clumpy.

    4. Add Life with Color

    Foundation can sometimes make your skin look a bit flat or one-toned. This is where a little color comes in.

    • The “Natural Flush”: Cream blushes are a beginner’s best friend. They are incredibly forgiving and blend effortlessly into the skin. Dab a little on the apples of your cheeks for a healthy, youthful glow.
    • Easy Lips: For an everyday vibe, a tinted lip balm or a soft nude gloss is perfect. It’s low-maintenance and doesn’t require a mirror to re-apply during the day.

    5. Setting the Masterpiece

    If you have oily skin or a long day ahead, you want your hard work to stay in place.

    • Powder Strategically: You don’t need to powder your whole face. Just hit the “T-zone” (forehead, nose, and chin) to stop unwanted shine while keeping your cheeks looking fresh and dewy.
    • The Final Spritz: A quick mist of setting spray can take away any “powdery” look and lock everything in for hours.

    Practical Tips for Your Daily Routine

    If you’re building your first kit, here’s a quick checklist of what actually matters:

    1. A Beauty Sponge: Much easier for beginners than brushes. Just wet it, squeeze it, and bounce your makeup onto your skin.
    2. Natural Lighting: If possible, do your makeup near a window. If it looks good in the sun, it will look amazing anywhere.
    3. Clean Your Tools: Wash your sponges once a week. Dirty tools are the #1 cause of “mystery” breakouts!

    Final Thoughts

    At the end of the day, makeup should be fun, not a chore. It’s a way to take five minutes for yourself in the morning. Don’t worry about perfection—worry about how you feel. Practice a few times, find what works for your face shape, and wear your confidence as your top layer.

  • Essential Beauty Habits That Support Healthy and Well-Maintained Skin

    Essential Beauty Habits That Support Healthy and Well-Maintained Skin

    We’ve all been there scrolling through social media, looking at someone’s flawless, glowing skin and wondering, What is their secret? While genetics certainly play a part, most people with great skin aren’t just lucky; they are consistent. They have built small, daily beauty habits that act like a long-term investment for their face.

    The truth is, you don’t need a thousand-dollar vanity full of products to have healthy skin. What you really need is a solid understanding of how to maintain it. In this guide, we’re going to walk through the essential beauty habits that actually make a difference, helping you achieve a well-maintained complexion without the stress.


    1. Consistency Over Intensity

    The biggest mistake people make in beauty is being “intense” for a week and then doing nothing for a month. You might buy a 10-step kit and use it for five days, but if you stop, your skin will go right back to where it started.

    Healthy skin loves routine. Whether it’s just a simple cleanse and moisturize, doing it every single morning and night is what builds the skin barrier. Think of it like going to the gym; you don’t get fit in one day, and you don’t get glowing skin with just one facial.

    2. Never Skip the “Double Cleanse”

    If you wear makeup or sunscreen (which you should!), a single wash usually isn’t enough. In the US beauty community, “Double Cleansing” has become a non-negotiable habit for a reason.

    • Step 1: Use an oil-based cleanser or micellar water to break down the surface oils, makeup, and SPF.
    • Step 2: Use a water-based gentle cleanser to actually clean the skin and pores. This habit ensures that you aren’t leaving behind debris that causes breakouts and dullness.

    3. Hydration: Inside and Out

    You’ve heard it a million times, but are you actually doing it? Drinking water is essential, but topical hydration is just as important.

    When your skin is dehydrated, it looks “flat” and fine lines become more visible. Using a moisturizer with ingredients like Hyaluronic Acid or Glycerin helps pull moisture into the skin. According to the Mayo Clinic’s guide on skin health, protecting your skin from excessive drying is one of the most basic ways to prevent premature aging.

    4. Make Sunscreen Your Best Friend

    If you had to pick only one beauty habit for the rest of your life, let it be wearing sunscreen. UV rays are the #1 cause of wrinkles, dark spots, and skin sagging. Even on a cloudy day in London or a rainy day in Seattle, those rays are reaching your skin.

    Choose a broad-spectrum SPF 30 or higher. A well-maintained skin routine is useless if you are letting the sun damage your cells every day. Think of SPF as your insurance policy for your face.

    A top-down flat lay of a silk pillowcase, a bowl of fresh berries, a glass of lemon water, sunscreen SPF 30, and a notebook.

    5. Don’t Touch Your Face

    This sounds so simple, yet it’s one of the hardest habits to break. Throughout the day, our hands touch keyboards, doorknobs, and phones—all of which are covered in bacteria. Every time you lean your chin on your hand or pick at a tiny bump, you are transferring that bacteria directly to your skin.

    Breaking the habit of touching your face can significantly reduce “mystery breakouts” along the jawline and cheeks.

    6. Beauty Sleep is Real

    Your skin goes into “repair mode” while you sleep. This is when your body produces growth hormones that help repair damaged cells and produce collagen.

    Try to get 7-9 hours of quality sleep. Also, a pro-tip for maintenance: change your pillowcase at least once a week. Silk or satin pillowcases are even better because they don’t create friction against your skin, which helps prevent sleep lines.

    7. Eat for Your Glow

    What you put inside your body shows up on the outside. Essential fatty acids found in walnuts, flaxseeds, and salmon help keep your skin’s oil barrier strong. Antioxidant-rich foods like blueberries and spinach help fight off environmental damage. A well-maintained skin habit includes a balanced diet that supports your natural glow.


    8. Simplify Your Product Shelf

    There is a new trend called “Skinimalism.” Using too many active ingredients—like mixing Vitamin C, Retinol, and various acids all at once—can actually damage your skin.

    A healthy habit is to listen to your skin. If it’s red or stinging, back off. Sometimes, all your skin needs is a break and a simple, nourishing moisturizer. Less is often more when it comes to long-term maintenance.

    Final Thoughts

    Building a beauty routine isn’t about being perfect; it’s about being mindful. By focusing on these essential habits—consistency, protection, and nourishment—you are giving your skin the best chance to stay healthy and vibrant for years to come.

    Start with one or two habits this week, and once they feel natural, add the rest. Your future self will definitely thank you for the glow!

  • Understanding Skincare Ingredients: What Really Matters for Healthy Skin

    Understanding Skincare Ingredients: What Really Matters for Healthy Skin

    Have you ever stood in the skincare aisle of a store like Sephora or Target, staring at a bottle, and felt like you needed a chemistry degree just to understand what was inside? You aren’t alone. With flashy marketing and complex names like Methylsulfonylmethane or L-Ascorbic Acid, it’s easy to feel overwhelmed.

    But here’s a secret: most of the “magic” promised by high-end brands comes down to a few key active ingredients. You don’t need a 12-step routine to get that healthy, “lit-from-within” glow. You just need to know which ingredients actually do the heavy lifting and which ones are just filler.

    In this guide, we are going to strip away the marketing fluff and look at the science-backed ingredients that truly matter for your skin’s health.


    The “Big Three”: Ingredients Every Routine Needs

    If you’re looking to build a solid foundation, you don’t need fifty different serums. Most dermatologists agree that a few “gold standard” ingredients can handle 90% of your skin concerns.

    1. The Anti-Aging King: Retinoids (Vitamin A)

    If there was a Hall of Fame for skincare, Retinol would be the first one in. Retinoids work by communicating with your skin cells, telling them to behave like younger, healthier cells.

    • What it does: It speeds up cell turnover, boosts collagen, and clears out pores.
    • Who it’s for: Anyone looking to reduce fine lines, treat adult acne, or fade dark spots.
    • Pro Tip: Start slow. Use it twice a week at night and always—I mean always—wear sunscreen the next day, as retinol makes your skin more sensitive to the sun.

    2. The Brightener: Vitamin C

    Think of Vitamin C as your skin’s personal bodyguard. During the day, your skin is attacked by “free radicals” from pollution and UV rays.

    • What it does: It’s a powerful antioxidant that neutralizes damage, brightens dull skin, and helps fade pigmentation.
    • Look for: “L-Ascorbic Acid” on the label—it’s the most researched and effective form of Vitamin C.

    3. The Protector: Sunscreen (SPF)

    This isn’t technically an “ingredient,” but the filters inside (like Zinc Oxide or Avobenzone) are the most important things you’ll ever put on your face. According to the American Academy of Dermatology, skipping SPF 30 makes all your other expensive serums useless because the sun will destroy any progress you make.


    Hydration vs. Moisture: Knowing the Difference

    Many people use these terms interchangeably, but they are actually different. Understanding this will save you from buying the wrong products.

    The Water-Pullers: Humectants

    Ingredients like Hyaluronic Acid and Glycerin are humectants. They act like tiny sponges, pulling moisture from the air into your skin.

    • The Trick: Apply Hyaluronic Acid to damp skin. If your skin is bone-dry, it might actually pull water out of your deeper skin layers, leaving you drier than before.

    The Sealers: Emollients and Occlusives

    Once you’ve pulled water into your skin, you need to lock it in. Ingredients like Ceramides, Squalane, and Petrolatum create a seal on your skin’s surface.

    • Ceramides: These are lipids that naturally make up your skin barrier. Think of them as the “mortar” between the bricks of your skin cells.

    Solving Specific Problems: The Targeted Actives

    Once you have your basics (Cleanse, Moisturize, Protect), you can add “target” ingredients based on your specific struggles.

    For Oily and Acne-Prone Skin (BHAs)

    Salicylic Acid is the most famous BHA. Unlike AHAs, it is oil-soluble, meaning it can travel deep into your pores to dissolve the “glue” holding dead skin and oil together. It’s a game-changer for blackheads.

    For Dull and Texture Skin (AHAs)

    Glycolic Acid and Lactic Acid work on the surface. They gently unglue the dead skin cells that make your face look “gray” or flaky. Lactic acid is especially great for beginners because it’s a larger molecule and doesn’t irritate the skin as much as glycolic acid.

    For Redness and Large Pores (Niacinamide)

    Niacinamide (Vitamin B3) is the ultimate “team player.” It plays well with almost every other ingredient. It helps regulate oil, calms down redness, and strengthens the skin barrier. If you have “angry” skin, this is your best friend.


    How to Read a Skincare Label Like a Pro

    Don’t get distracted by the fancy claims on the front of the bottle. Turn it around and look at the INCI (International Nomenclature of Cosmetic Ingredients) list.

    1. The First Five: Ingredients are listed in order of concentration. The first five ingredients usually make up about 80% of the product. If your “Vitamin C Serum” has Vitamin C listed at the very bottom, it’s probably not doing much.
    2. Fragrance is Optional: In the US, many people prefer fragrance-free products because synthetic scents are a top cause of skin irritation.
    3. Alcohol Labels: Look out for “Alcohol Denat” or “Isopropyl Alcohol” high up in the list, as these can be very drying. However, “Fatty Alcohols” like Cetyl or Stearyl alcohol are actually good for your skin!

    Final Thoughts: The “Skinimalist” Approach

    You don’t need a bathroom counter full of bottles to have great skin. In fact, using too many actives at once can lead to a “damaged skin barrier,” which looks like redness, peeling, and stinging.

    Start with a gentle cleanser, a good moisturizer, and SPF. Once your skin is happy, introduce one active ingredient (like Retinol or Vitamin C) and wait at least 4 weeks to see how your skin reacts. Consistency will always beat intensity.